 1")
Description
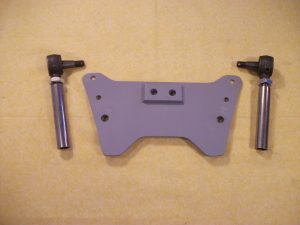
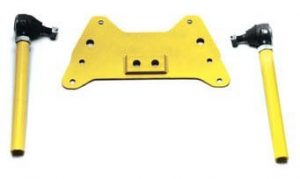
ES-1170 Turbo 350 Transmission Mount for 1940-1948 Chevy (full kit, works with Turbo350,PowerGlide and Standard)
This transmission mount is recommended to be used with v8 engines only.
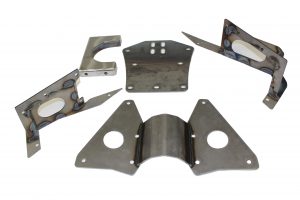
Fits only minor modifications to original cross member. Bolts and instructions furnished.
Fits Turbo 350, powerglide and standard transmission.
Installation Notes:
Installing the engine goes hand in hand with the transmission.
Since both an engine mount kit and the ES-1170 transmission mount are often used together, the instructions below will cover both.
For example purposes, the instructions below assume CP-1106. If you use a different motor mount kit, use the instructions included with your kit as it will likely be slightly different.
Step 1.
Remove the original engine, transmission and rear end.
Remove the transmission cover in the floor for access.
Remove the original small-center transmission mount by drilling out the four rivets.
As you progress you will find other odd pieces that will need to be removed for clearance and fit. Remove these as needed.
Step 2. (Mounting the engine).
Slip both the frame adapters over the frame and locate as shown below.
Step 3. (Mounting the transmission).
Install the mounting plate by locating it over the four holes you already drilled.
Check the centering, then clamp it in place and ream-drill the holes to 3/8″.
Bolt it together.
Drill the two center holes through the top and bottom of the original cross member (1/2″).
From underneath, drill the exit holes to 7/8″ for socket clearance.
Step 4.
At this point we suggest setting the engine in place to check mounting.
Step 5. (Engine).
Now drill holes through frame adapters and install bolts.
Do not over tighten.
If desired, frame adapters can be welded in place, but this isn’t needed or recommended.
Step 6.
Floor board cover may need modification for clearance.
Check while reinstalling cover and finish as needed.
This depends on the transmission you are using.
![]() WARNING: This product can expose you to chemicals including nickel and urethane, which are known to the State of California to cause cancer and birth defects or other reproductive harm. For more information go to www.P65Warnings.ca.gov.
WARNING: This product can expose you to chemicals including nickel and urethane, which are known to the State of California to cause cancer and birth defects or other reproductive harm. For more information go to www.P65Warnings.ca.gov.


Reviews
There are no reviews yet.