
Description
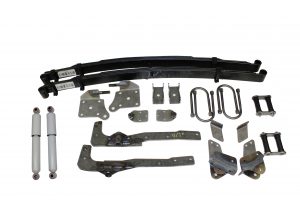
AS-2017CGLR Complete Leaf Spring Rear End Mounting Kit for 1941-1948 Ford (Gas Shocks, Low Rider Springs)
Bolt-on Complete Rear End Mounting Kit for 1941-1948 Ford adds needed reinforcement to the rear of your frame. No modifications needed to recommended frames. Kit fits a wide variety of rear ends (up to 3″ diameter) depending on the offset of wheels and tire choice. We recommend approx 58″ outside to outside drum. These mounts are used with Chassis Engineering Slider Springs.
Includes:
Front spring hangers
Rear spring hangers
Upper shock mounts
Lower shock mounts
Gas shocks
Chassis Engineering Low Rider Springs
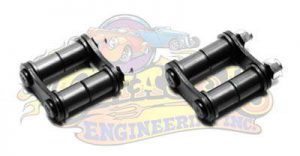
Shackles
U-bolts
Spring pads
Hardware & Instructions
Note: This fits Chassis Engineering Inc 2-1/2″ wide springs, not stock springs
Prevent your suspension from bottoming-out and expensive vehicle damage by including a pair of adjustable rubber snubbers with your order.
Installation Instructions for AS-2017CGLR Complete Bolt-on Rear End Mounting Kit for 1941-1948 Ford (Gas Shocks, Low Rider Shocks).
Rear-ends:
* 1968-1975 Nova
* 1967-1969 Camaro
* 1967-1969 Firebird
* 1957-1949 Ford 9″(Wide Tires Only)
* Granada & Monarch 8″(Wide Tires Only)
Note: The above mentioned Ford rear-ends are too narrow, unless used with big tires and offset rims.
1. Straighten frame edges to 90 degrees at mount location.
2. Install rear spring mount by matching (original) rear most shock mounting hole in frame with front hole in the Chassis Engineering mount. Clamp into place and drill remaining holes. Bolt mount to frame.
3. Locate front spring mount using diagram. Drill 3/8″ hole front outer hole in location given. Install bolt in this hole only. Clamp mount firmly onto frame.
4. Install spring in front Chassis Engineering mount. Line up spring with rear mount. Mark and drill final 3 holes in each front mount. Now install all the bolts.
5. When installing springs, first fasten springs at front. Second, bolt rear end in place and lastly, install shackles. Be sure springs clamp tightly into saddle on rear end. Center bolt in spring should be the same as the one used with your rear end originally.
6. Lower shock plate can be installed with the bend up (normal) or bend down for lowered cars. Switch right side to left side to change. Install lower shock plate with shock mount pointed to the rear and inside springs.
7. Upper shock mounts are located on the front of the rear crossmember in the position shown below:They can be welded or bolted in place. To bolt into place, hole-saw an access hole directly under the shock mount. Drill holes and bolt to crossmember. Adjust shock length by changing the upper mount hole or by switching the bottom plates. Do not adjust until you have the full weight on the rear. Length will vary car to car.
8. New springs will settle about 1″ after roughly 500 miles. Check shock travel at this time.
Caution: Be sure rubber stops are in place between frame and rear end to prevent shock bottoming. If the shock bottoms while driving, sooner or later something will break.
![]() WARNING: This product can expose you to chemicals including nickel and urethane, which are known to the State of California to cause cancer and birth defects or other reproductive harm. For more information go to www.P65Warnings.ca.gov.
WARNING: This product can expose you to chemicals including nickel and urethane, which are known to the State of California to cause cancer and birth defects or other reproductive harm. For more information go to www.P65Warnings.ca.gov.


Reviews
There are no reviews yet.