
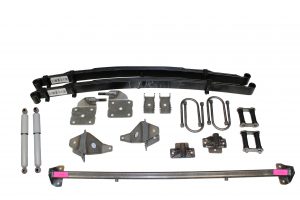
Description
AS-1021 Rear End Mounting Kit for 1949-1954 Chevy. Bolt on kit for the 1949-1954 Chevy car. For use with Chassis Engineering 2 1/2″ wide slider springs.
This Kit Includes:
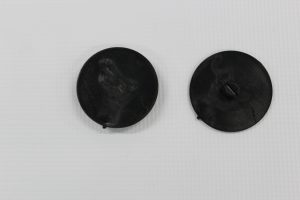
front spring mounts
rear spring mounts
Installation instructions for AS-1021 Bolt-on Parallel Leaf Spring Rear End Mounting Kit for 1949-1954 Chevy Car.
Rear End Mounting Kit
1. Remove original rear-end, springs and shocks. Remove original spring mounts and rivets.
2. Clamp new front spring mounts to frame.
Match 3 original rivet holes to new spring mounts. The mounting plate has a small notch cut into it. The notch goes to the inside rear,
Enlarge the holes to 3/8″. On some models, there will be a rivet head in the way. Either grind the rivet head almost flush to the frame, or drill a slight dimple in the mount to fit over the rivet. Either way, the mount should fit flat on the frame. Bolt the spring mount in place using the 3 holes, and drill (3/8″) and bolt the last hole.
3. Clamp the rear-mounts to frame. Line up the front to holes of the mount to the front 2 holes of the old mount. These plates are also notched slightly, which should point to the inside front. Drill/ream drill the holes and install the bolts.
4. Now check that the wheels are in the center of the fender openings. Do this by installing springs in the front mounts and attaching rear end to the springs. Be sure car is safely supported by jack stands. ALso make sure spring center bolts are in guide holes on rear end pads. Install U-bolts and spring plates. Shock studs point forward on the inside of the spring. Angle on shock plates point upward. Raise the rear end and springs high enough to install shackles. Install wheels and tires and visually check for centering. Centering is not a problem on these years, but it is always to check and make sure and make adjustments (if needed) now.
5. Check and tighten all bolts.
Rear shock kit:
Note: with the 49-54 Chevy, we have found a wide variety in frame width behind the transmission crossmember and specifically with the rear end. There are no original frame crossmembers in this area.
1. The upper shock bar will have to be finish-welded.
2. Clamp the shock mount to the frame. Center the mounting holes on one side, drill these 3 holes.
Now check the other side. If holes are centered, remove the bar and finish the welding. If not, then cut the tack welds, center the second mount and mark the new location on the bar (or just clamp it back together) Remove the bar and do the necessary welding.
4. Clamp the finished bar into place and drill the last 3 mounting holes.
5. Now go back and check for loose bolts, pieces fitting right, parts rubbing on other parts and give everything a general overview for correct operation. Be sure car bottoms out on a rebound rubber and not on the actual shocks. If the car rebounds on the shocks, something will likely give sooner or later.
Springs:
New springs will normally drop up to an inch in the first 500 miles of use. Keep this in check. Depending on the weight of the car, new springs can have a slight arch (both upward as well as downward) or sit straight, this is normal.
We do not recommend hard bushings of any kind for use with springs. Rubber bushings will absorb vibrations and road noise and allow for some flexing, which works great for this application.
![]() WARNING: This product can expose you to chemicals including nickel and urethane, which are known to the State of California to cause cancer and birth defects or other reproductive harm. For more information go to www.P65Warnings.ca.gov.
WARNING: This product can expose you to chemicals including nickel and urethane, which are known to the State of California to cause cancer and birth defects or other reproductive harm. For more information go to www.P65Warnings.ca.gov.


Reviews
There are no reviews yet.