
Description
AS-2014 Rear End Mounting Kit for 1935-early 1936 Ford
Completely bolt-on rear end mounting kit adds needed reinforcement to the rear of your frame. No modifications needed to recommended frames. Kits use 1968-74 Nova, 1967-69 Camero and Firebird multi leaf rear ends, 1957-59 Monarch-Granada 8″. Other rear end kits fit by simply moving the spring pads. These mounts are used with Chassis Engineering Slider Springs. Kit includes front & rear hanger brackets, hardware & instructions.
Note: This kit is for 1935-1936 EARLY frames. In 1936 the frames were changed mid-year. See diagram to help you identify which frame you have if you have any doubts.
Installation Instructions for AS-2014 Bolt-on Parallel Leaf Spring Rear End and Shock Mounting Kit for 1935-1936 Ford
Rear Ends:
* 1968-1975 Nova
* 1967-1969 Camaro
* 1967-1969 Firebird
* 1957-1959 Ford 9″
* Granada 8″
* Monarch 8″
Please read the full instructions before starting.
1. Locate front spring mount as shown below.
Use a carpenters square. The front measuring point is the rivet located oposite X center and on the bottom of the frame. Use as a double-check only. Remove two rivets from the bottom rail and one from the top. Use care as some holes are reused. Rivet holes approximate mount holes only as they vary frame to frame. DO NOT USE THESE FOR LINE UP
2. Straighten lower frame lip using a square. Mount will not seat properly if the lip is not 90 degrees. IMPORTANT: The above measurements are as accurate as we can make it. However, Ford was not exact on their ender opening location from year to year and sometimes even model to model (the most affected years are 1937 and 1938). We suggest that you check wheel centering before fastening the front mount permanently to the frame.
3. Clamp the front mount in place and drill 2 side holes 5/16 inch through outer and seperated inner frame. There is about 1 inch between. Drill inner frame only, to 7/8″ for socket clearance. Bolts tighten on outer rail only. Install side bolts. Now ream-drill the two bottom holes. Install bottom bolts and tighten. Locate and mount top supporting tab. Drill and bolt the two pieces together.
4. Remove stock shock absorbers and repair frame if cracked (a common problem on 1935-1940).
5. Position rear mounts on frame corners and along bottom frame rail. Front hole in mount will match hole in frame. Remove corner rivets in frame and clear any holes that interfere with mount. To avoid drilling into gas tank, place a safety block between frame and tank. Drill the two side holes and install the bolts. Be sure to mount close to the frame. It is a good idea to clamp the mount in place with several C-clamps before drilling. Remove safety blocks when done.
6. Shock kit – position spring retainer plate with shock stud inside spring and pointed rearward. Start with angle pointed upward. Point angle down if your car is lowered radically. (Down position gives extra shock clearance before bottoming). Do not allow shock to bottom out during use.
Install a rubber stop on the frame above the axle to prevent breakage. Top shock stud should be positioned as shown. Bolt directly to the front side of rear crossmember. Shock action can be softened by moving top mount inward and stiffened by moving it outward. Always check clearances. Grind crossmember lip for shock clearance if needed.
7. To assemble, start with the front pivot bolts. Next, install the rear end to springs exactly as it was when removed from donor car.
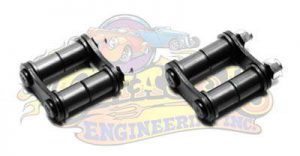
Last install shackles at rear. Slight misalignment in the front mount will be absorbed in rubber bushings.
Additional Notes:
1. Nova drive shaft will fit as-is if from same engine-transmission and rear-end style.
2. We recommend driving your car about 500 miles with full weight before making any modifications.
3. On some early pickup models, minor sheet metal work will be required for clearance around the rear bracket.
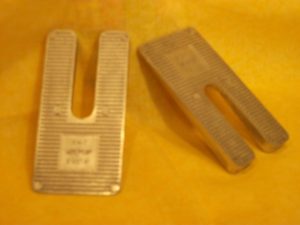
4. Not all rear-ends (even from the same models) will have the correct pinion angle build-in. Spring angle wedges are available from us.
Springs:
New springs will normally drop up to an inch in the first 500 miles of use. Depending on the weight of the car, new springs can have a slight arch, sit flat or be slightly reverse-arched. This is normal.
The spring is acting like it should. Also, parallel leaf springs are almost never perfectly parallel, it is just a name for this type of suspension.
We do not recommend hard bushings of any kind for springs. Rubber bushings will absorb vibrations and road noise and allow for some flexing.
![]() WARNING: This product can expose you to chemicals including nickel and urethane, which are known to the State of California to cause cancer and birth defects or other reproductive harm. For more information go to www.P65Warnings.ca.gov.
WARNING: This product can expose you to chemicals including nickel and urethane, which are known to the State of California to cause cancer and birth defects or other reproductive harm. For more information go to www.P65Warnings.ca.gov.


Reviews
There are no reviews yet.